Introduction 2: How to populate complex designs with ContentKit
ContentKit excels at handling deeply nested components and complex designs. Even dependencies where layers depend on specific property configurations pose no problem.
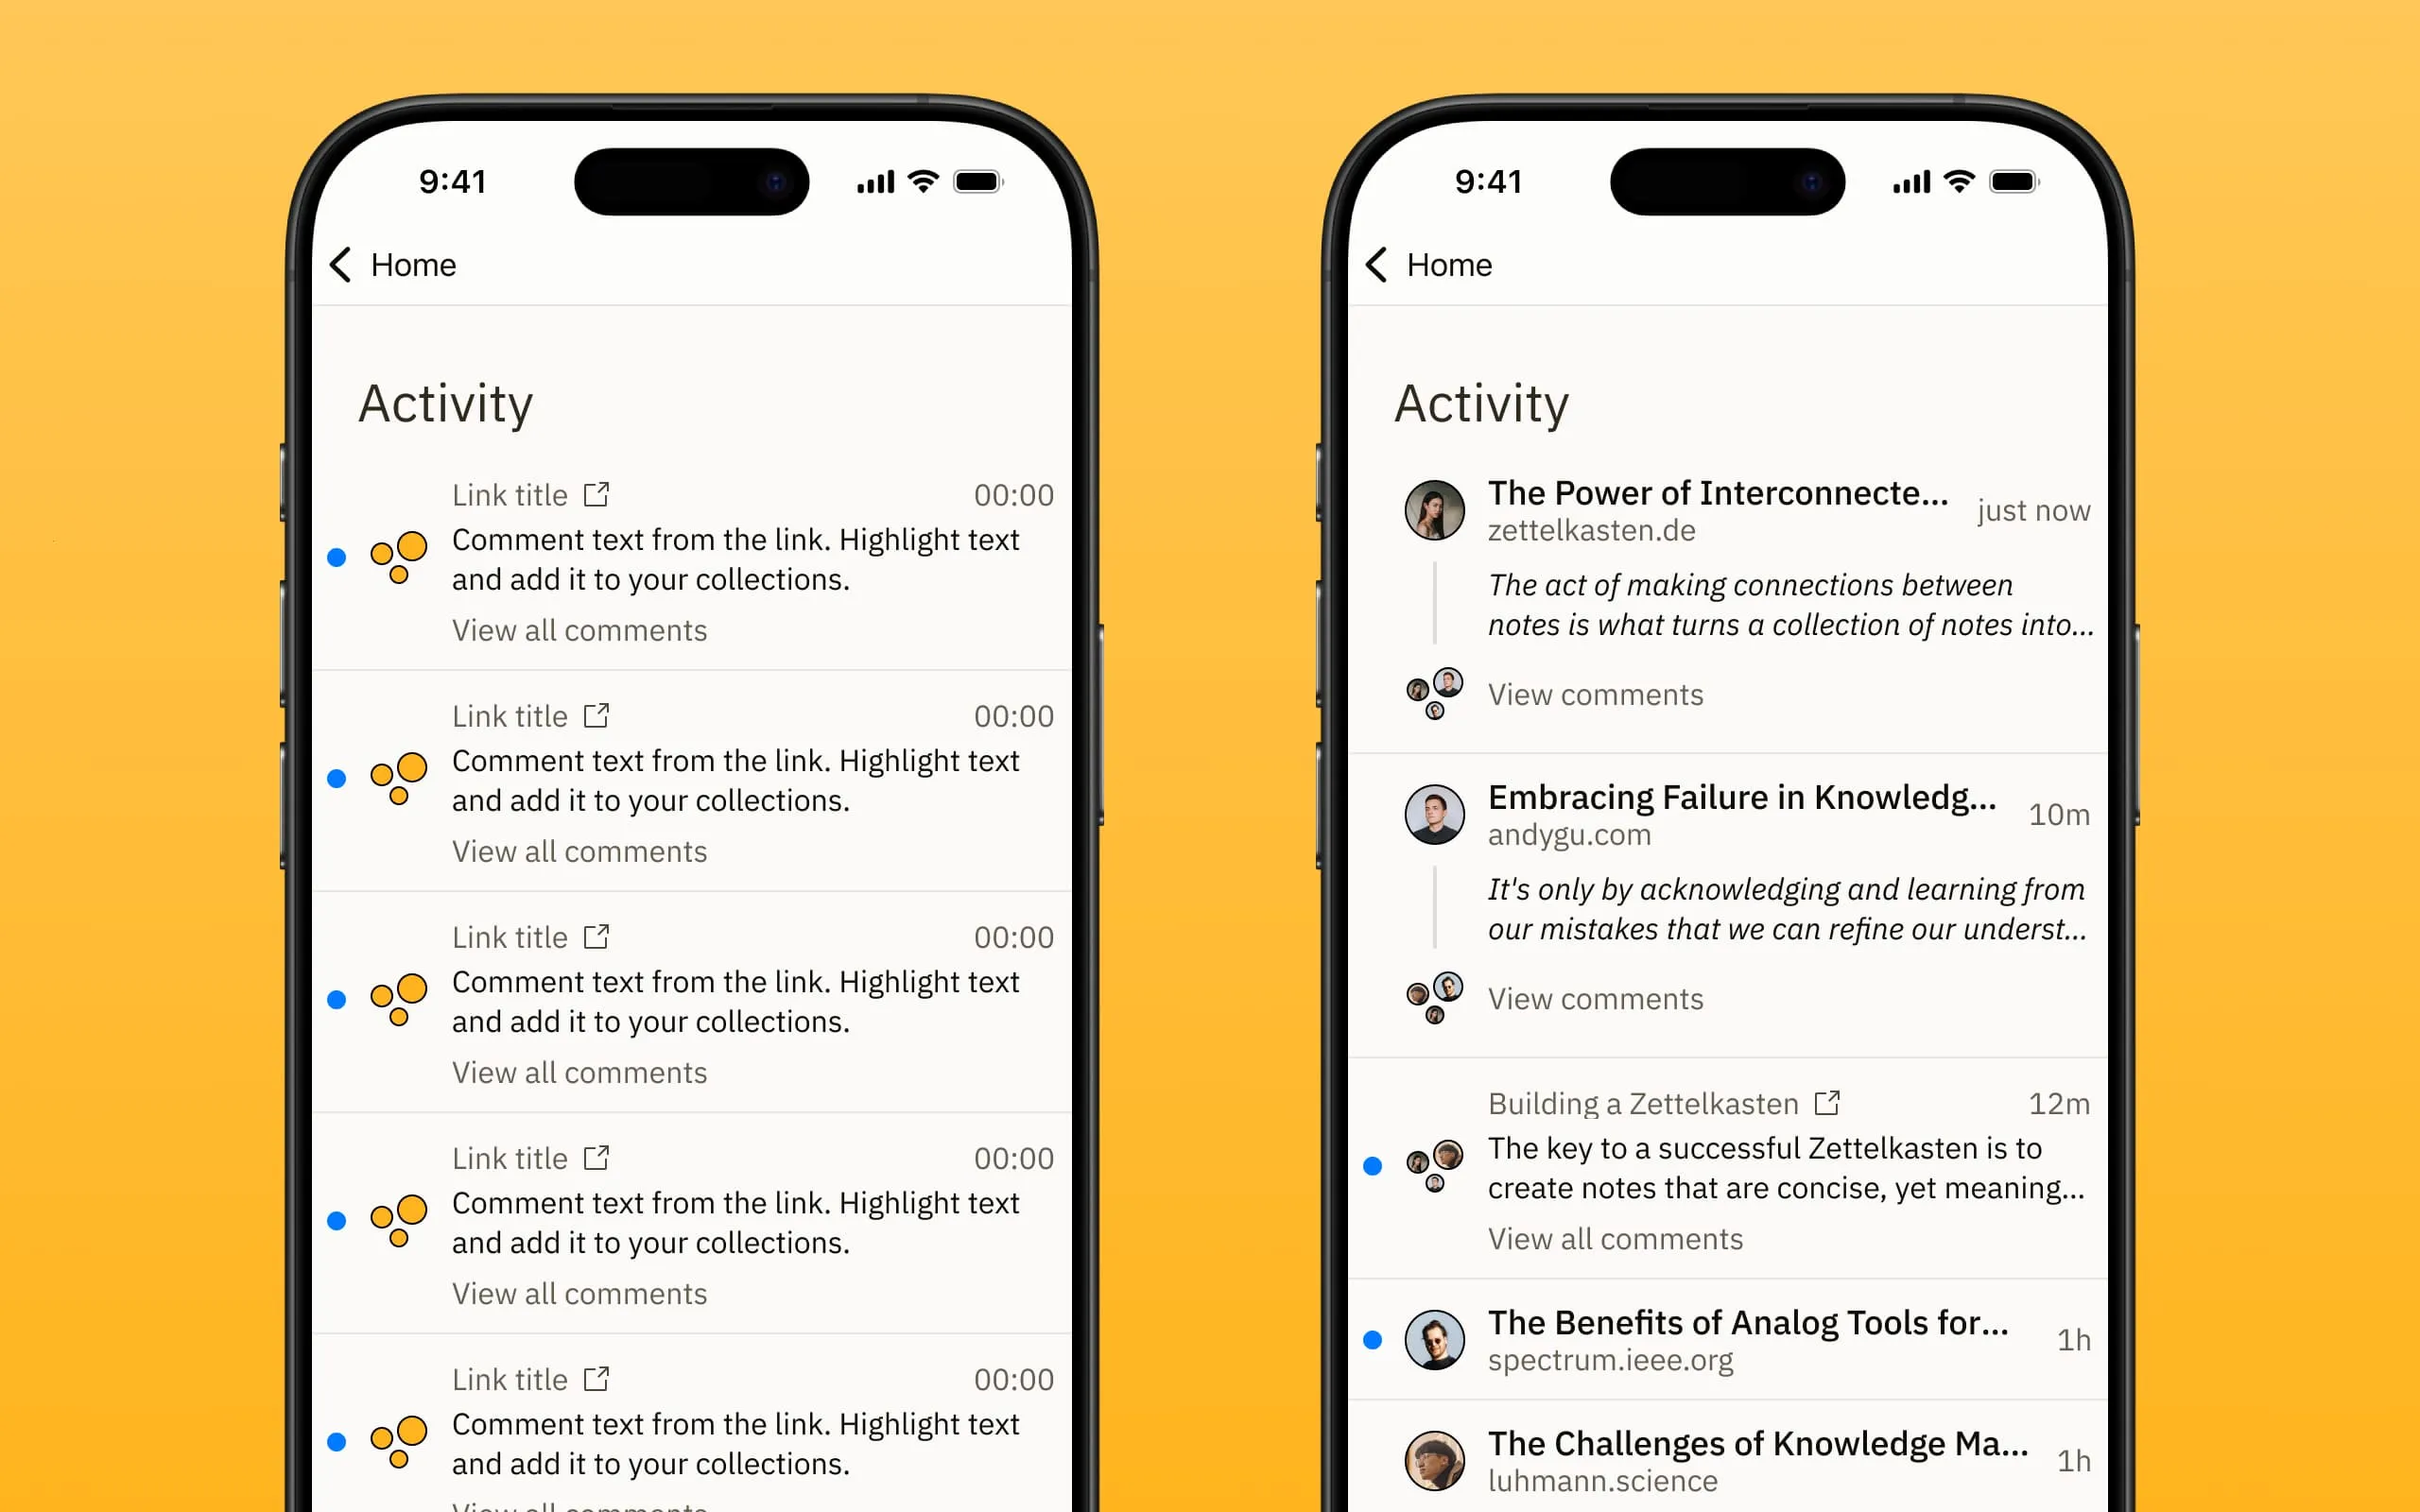
In this post, I’ll show you some techniques I’ve used to combine basic building blocks – text and variant properties – to populate complex designs. I was working on a fairly complex design for a bookmarking app, and I think the list component above is a great example to demonstrate these techniques.
It looks simple, but upon closer inspection, a few questions arise: How are the read indicators handled so they don’t reset? How does the plugin populate link URLs or avatar images when they don’t even exist in the initial screen on the left? And what happens to the “Link title” layers?
Setting up the List Item Component
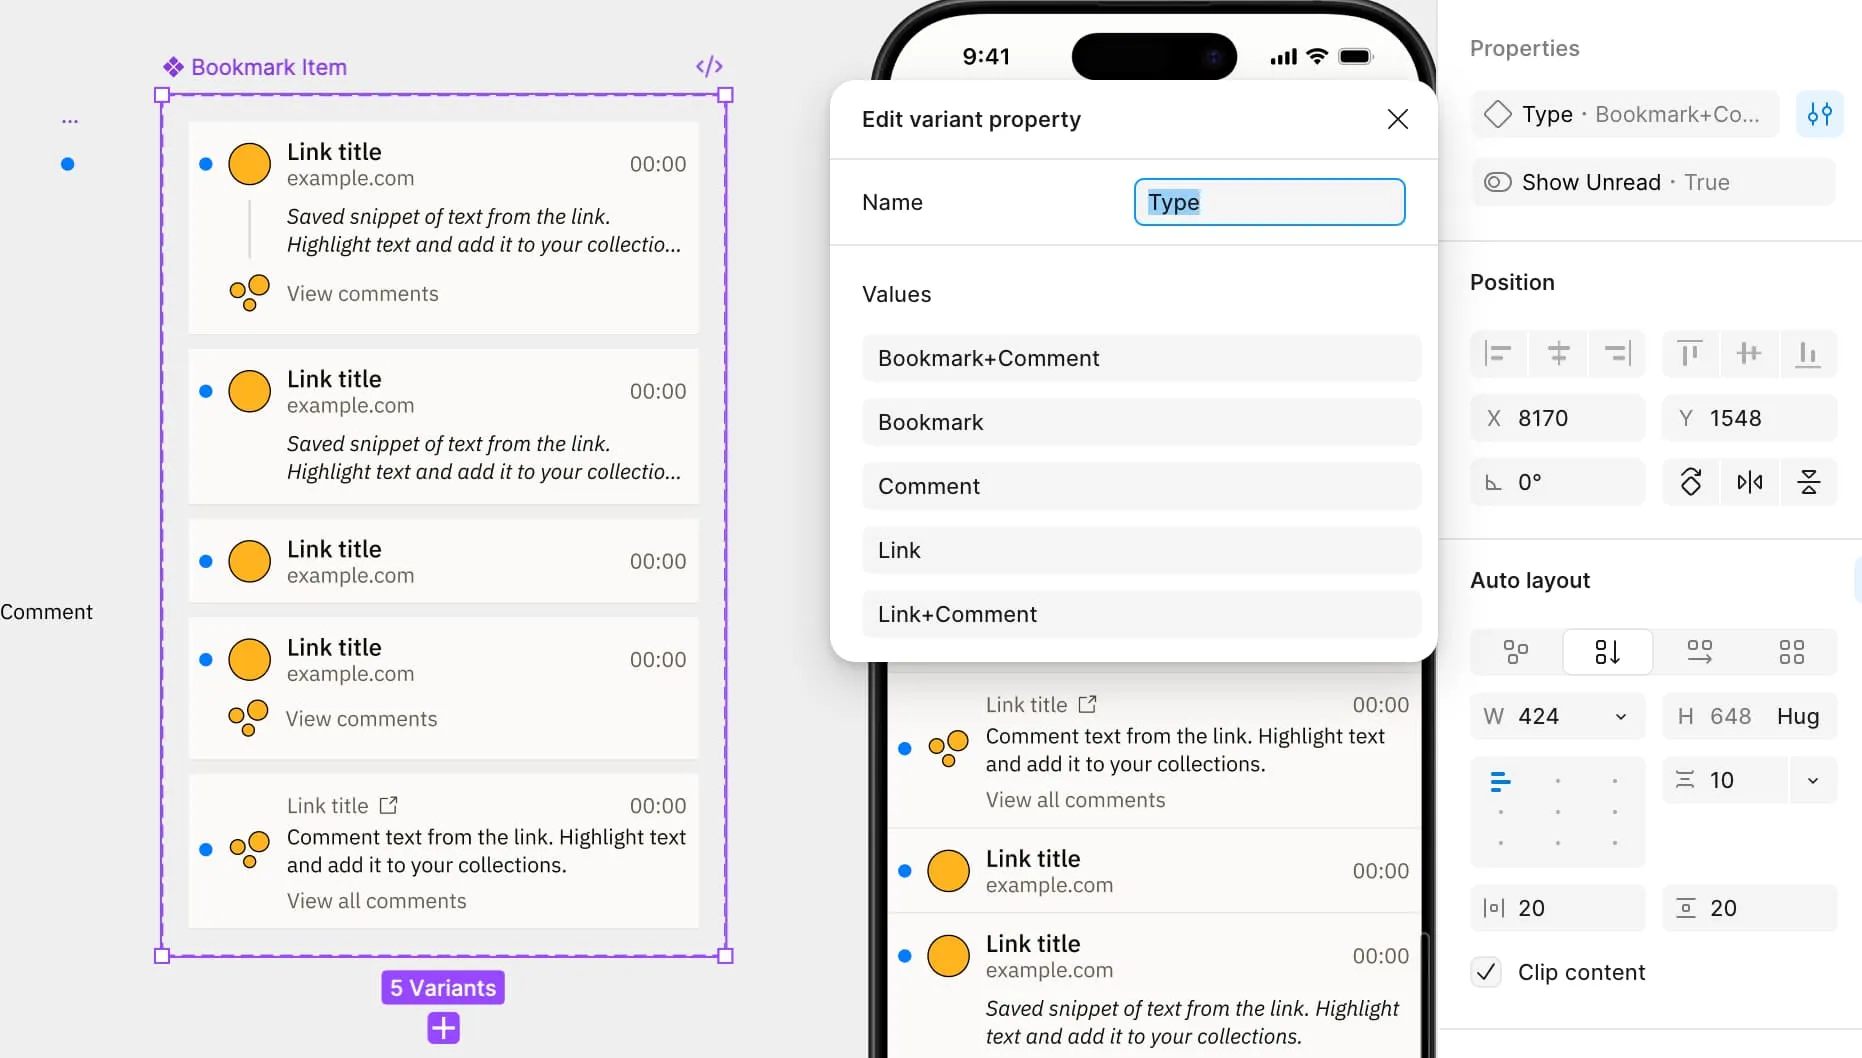
I set up the component with five different variants at the top level that handle the general structure of the list items. This is standard practice for any design, and I do this regardless of whether I use ContentKit or not.
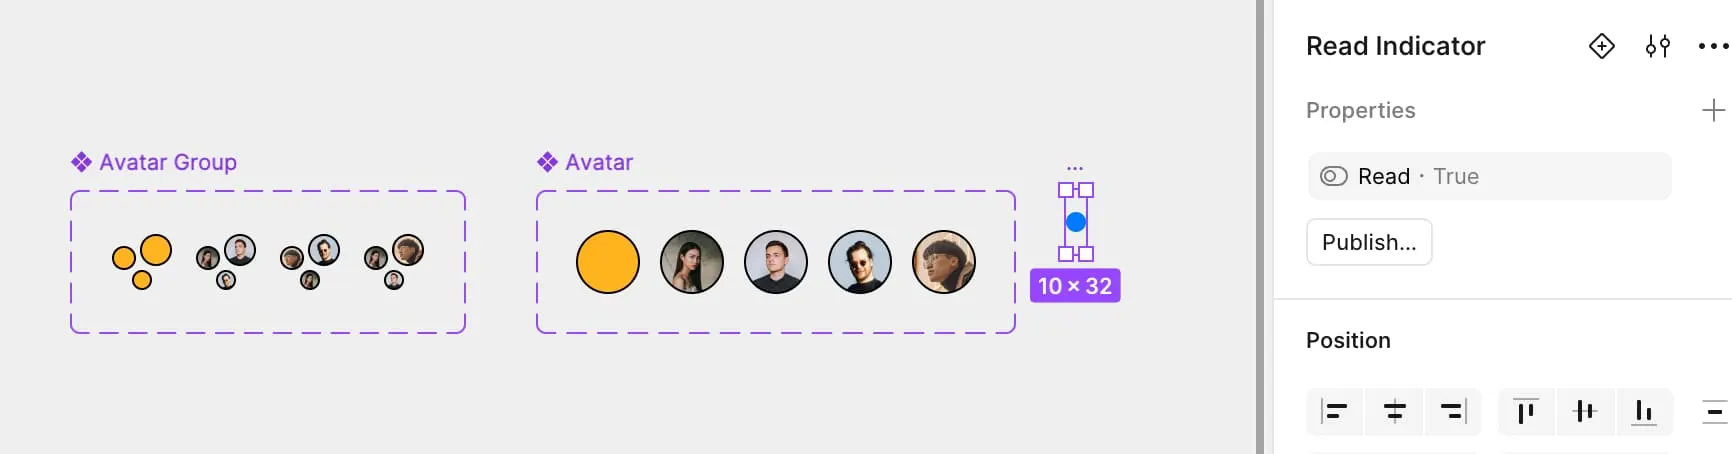
The avatar and read indicators are nested helper components with variants for different images, simply named 1, 2, 3, 4, etc. The read indicator has a boolean property tied to the visibility of the blue dot.
Setting up the Dataset
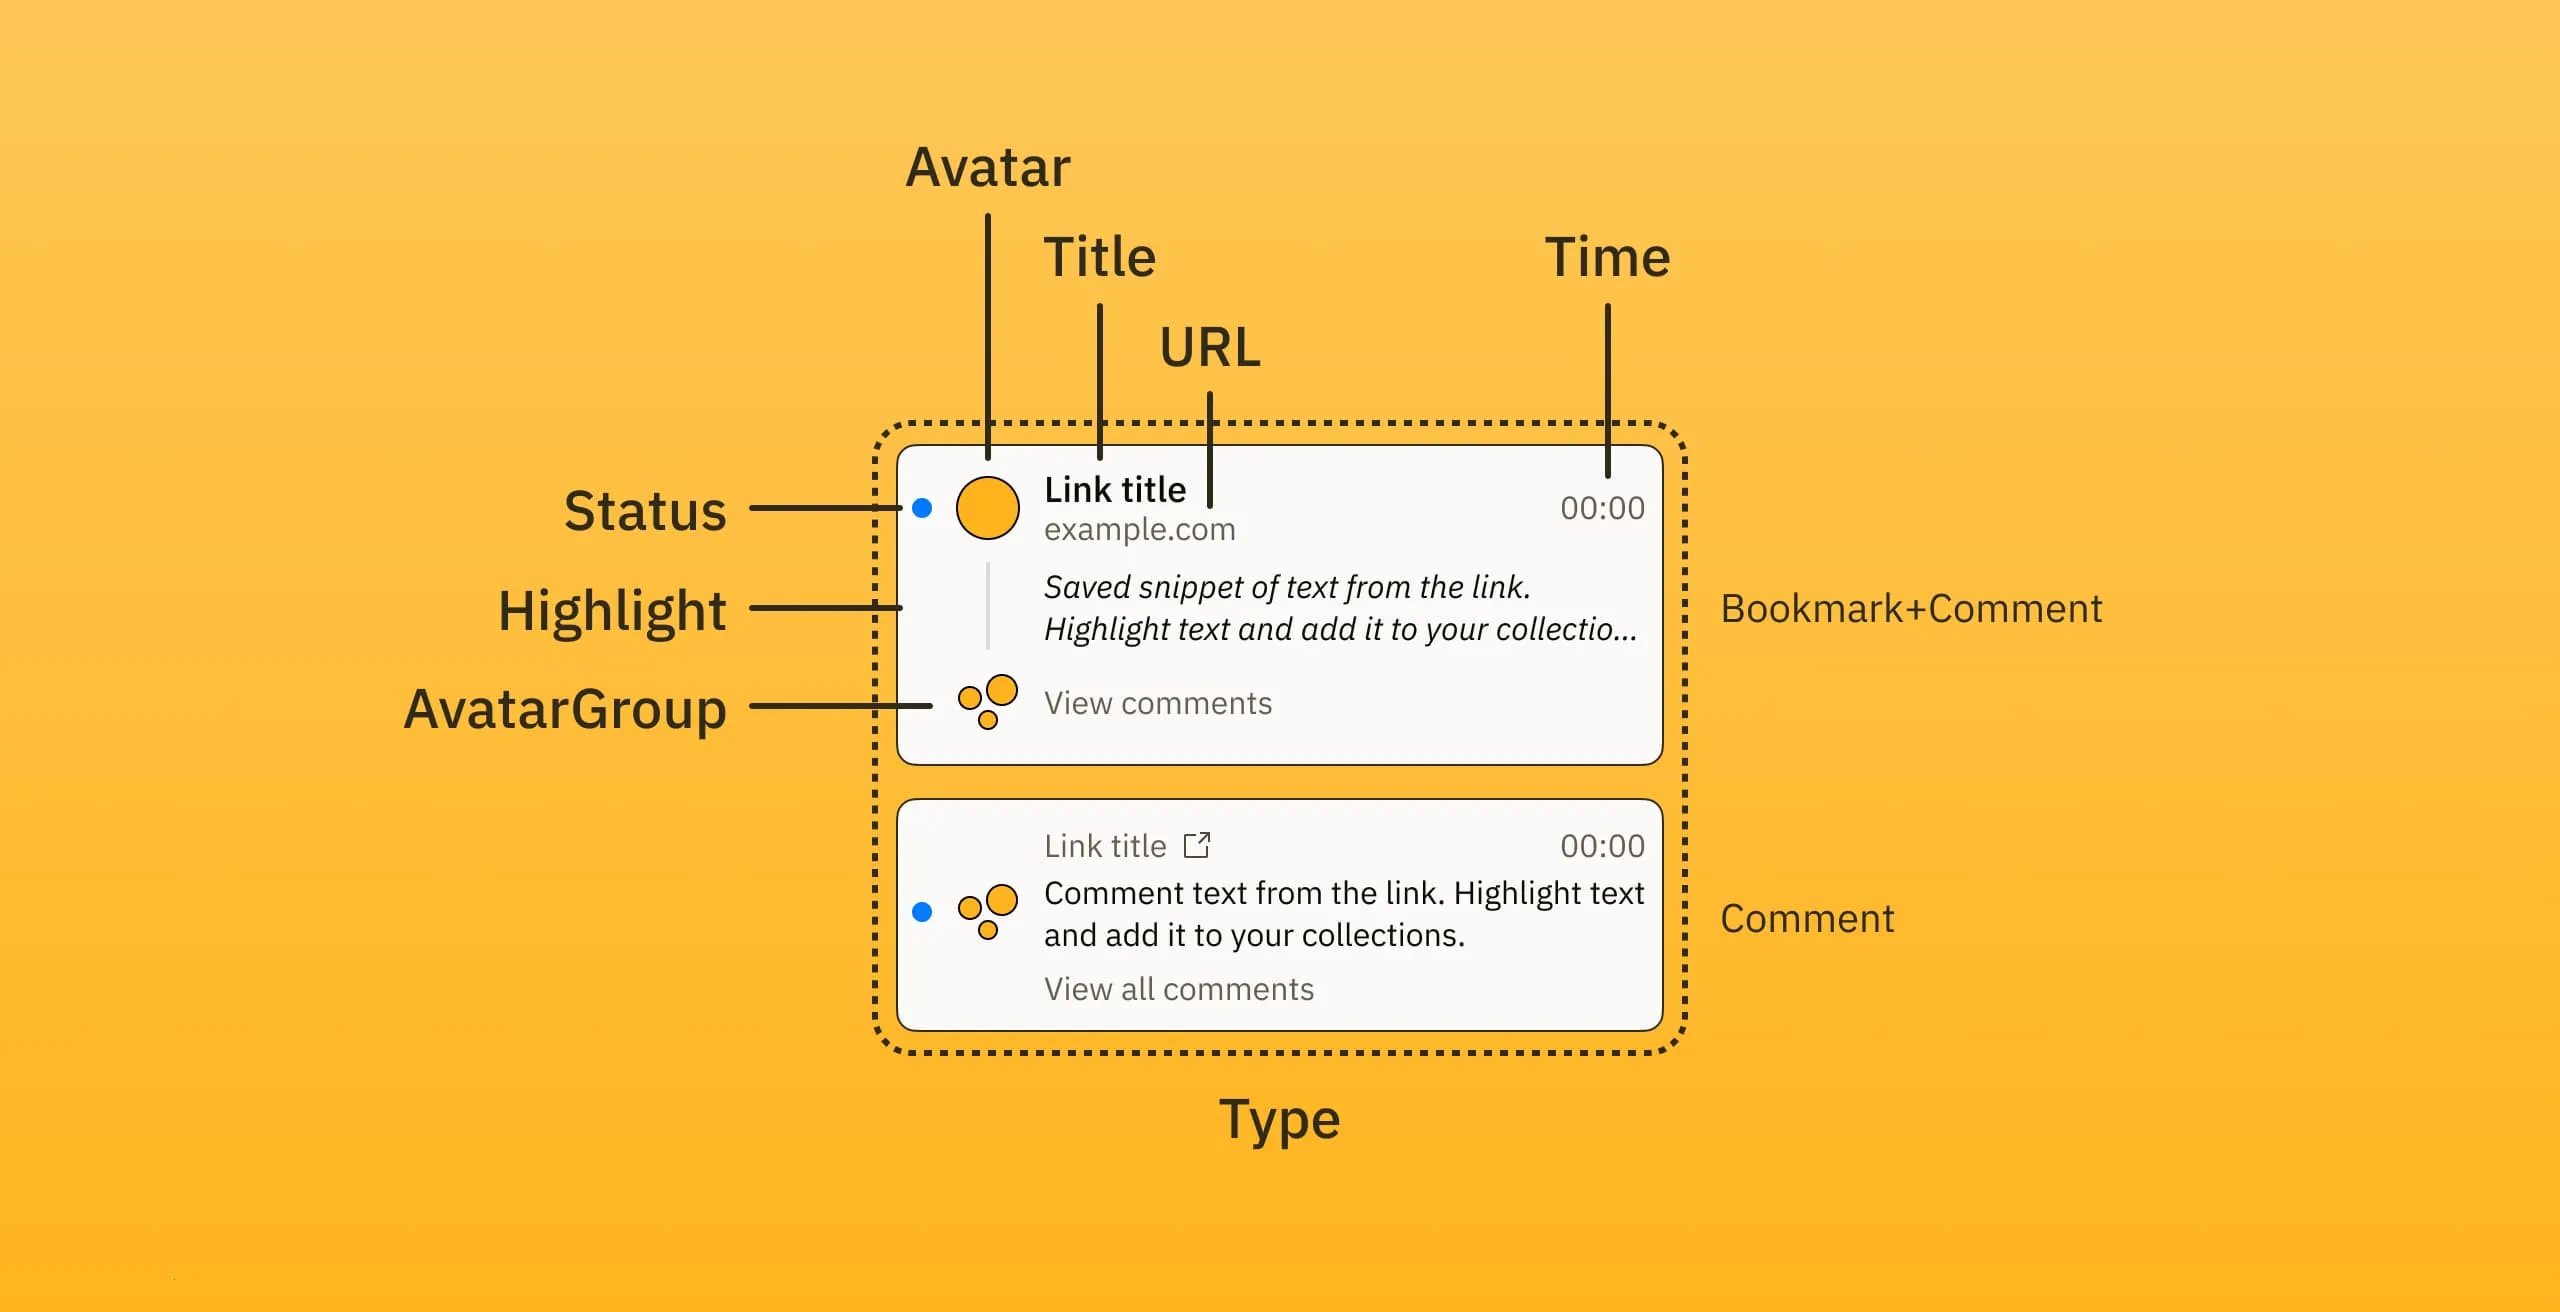
Below is part of the dataset I used to populate this list. It includes text for link titles, URLs, and highlights, as well as properties that control other states not displayed via text, such as the read indicator and variants. I explained how variant property formatting works in the previous post, but as you can see in the screenshot above, it follows this schema: PropertyName=Value.
| URL | Title | Type | Avatar | Status | Highlight | Comment | Time |
|---|---|---|---|---|---|---|---|
| zettelkasten.de | The Power of Interconnected Notes | Type=Bookmark+Comment | User=1 | Read=false | The act of making connections between notes is what turns a collection … | Saved for later review of knowledge management systems | just now |
| andygu.com | Embracing Failure in Knowledge Management | Type=Bookmark+Comment | User=2 | Read=false | It’s only by acknowledging and learning from our mistakes that we can refine our understanding of the world and develop more effective strategies for managing knowledge. | Interesting perspective on failure in learning | 10m |
| luhmann.science | Building a Zettelkasten | Type=Comment | User=3 | Read=true | The key to a successful Zettelkasten is to create notes that are concise, yet meaningful, and to link them together in a way that allows for easy navigation and exploration. | Need to revisit when building my own note system | 12m |
| analog.earth | The Benefits of Analog Tools for Digital Knowledge Management | Type=Link | User=4 | Read=true | By incorporating analog tools into our digital workflows, we can create a more balanced and effective approach to knowledge management, one that leverages the strengths of both worlds. | Great point about balancing analog and digital tools | 1h |
I then assigned the columns to their corresponding layers. The type column is assigned to the entire instance, while the others are assigned to different layers. You need to do this for all variants, so it’s best to work within the main component. Assigning to instances might work, but the assignments are tied to layer names, and Figma could reset them after component updates.
Populating the List
ContentKit populates variant properties starting with the outermost layer, so the “Type” column gets populated first. This ensures that the correct layers inside variants are present. Otherwise, some layers might get populated at first, even though they are replaced later when the variant changes, others might only exist after swapping a variant – like the “AvatarGroup” and “URL” layers when swapping from the “Comment” variant to the “Bookmark+Comment” variant.
Either way, you would end up with either outdated or missing layers. As far as I know, ContentKit is the only populate plugin that handles nested assignments correctly.
Summary
With these techniques, you can populate and automate the content of any screen design. By using variant properties and keeping in mind how ContentKit populates nested layers, you can precisely update every part of your designs, down to the smallest icon. With the help of layer visibility properties, you can control which layers show up in your prototypes, and with variants you can even update images to create realistic scenarios.